As travel advisors, creating professional-looking, branded and cohesive marketing materials is a natural part of the job, albeit an intimidating one for those who don’t have extensive graphic design experience. Canva, a free online design software, is often the recommended solution because of its easy-to-navigate interface, though like with any new platform, there’s an inherent learning curve. If you’re looking to expand upon your Canva knowledge — or are wondering how to use Canva in general — read on for answers to some of the most frequently asked design questions and common inquiries.
Education: Canva Design School
With all of Canva’s premade templates at the ready, it’s easy to overlook the method to the design madness. However, Canva Design School is a great resource for both new and experienced users to learn about all the ways Canva can support an advisor’s business development. The school offers a variety of courses, including Canva for Work, Marketing with Canva, Print Advertising, Creating a Logo, Typography & Layout, Social Media Mastery, Graphic Design Basics and much more.
Each course varies slightly in structure, but generally, they feature a handful of lessons at a couple of minutes apiece. At the end of each lesson, Canva allows you to practice the skills you learned about and will even assist users by pointing out where certain tools are located on the site. Some courses are flagged as beginner-friendly, making those a recommended starting point for new users. Don’t worry — these courses are fairly engaging and, at most, take three hours to complete. Not bad, huh?
The Best Canva Templates
Because each individual user’s needs for Canva vary, there’s no unanimous “best” template — what one considers a useful template, another advisor could never need. However, factoring in the nature of the travel industry, there are a few key categories that will likely appeal to the large majority of business professionals.
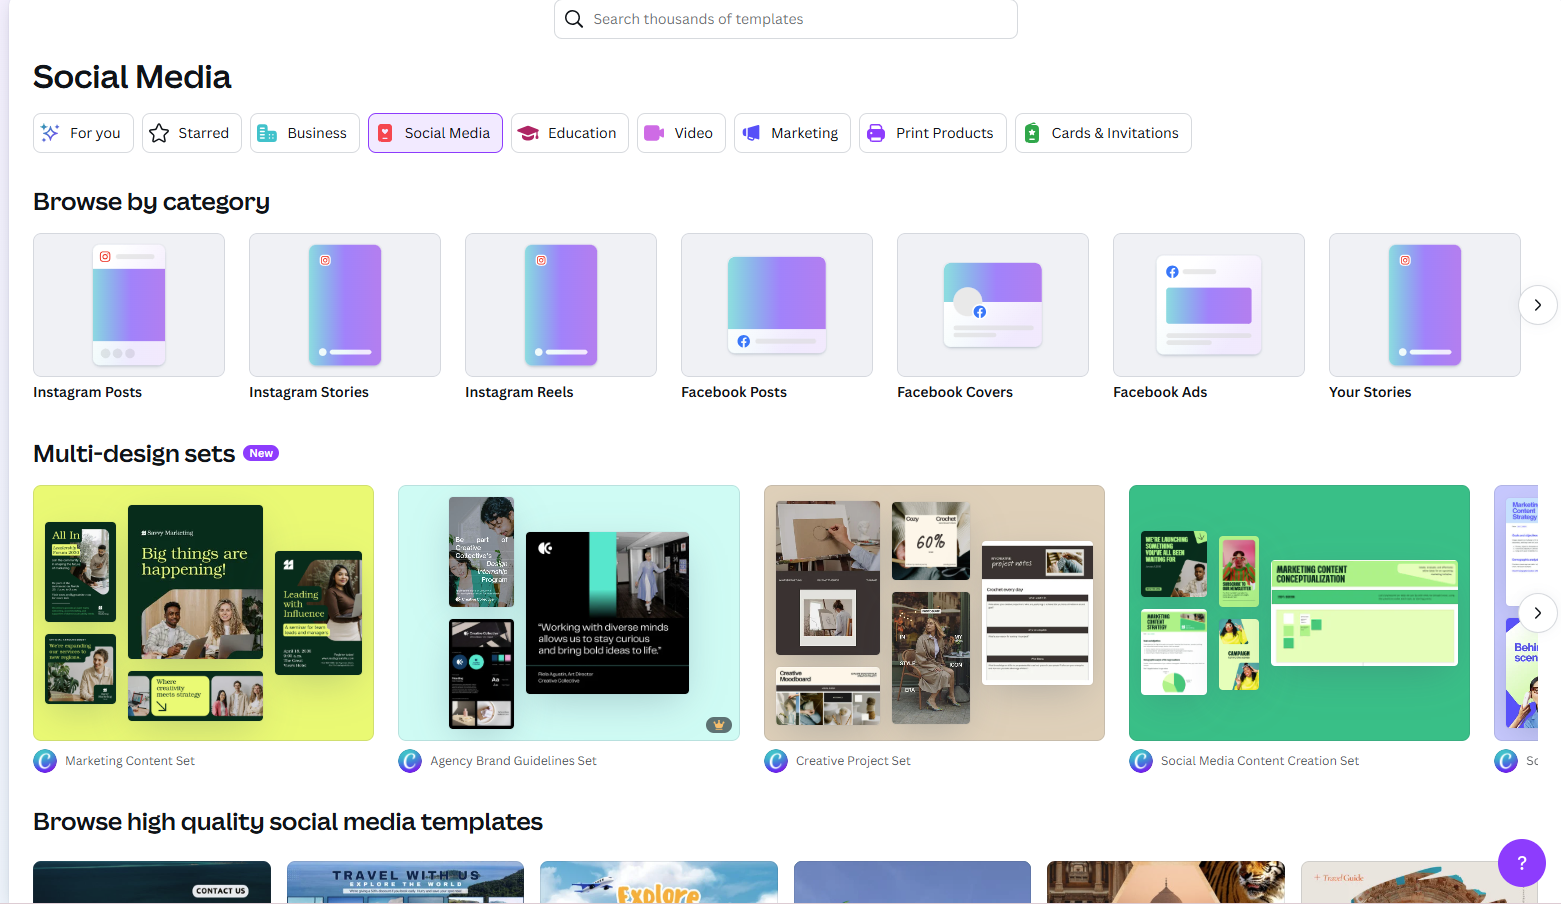
First, with Canva’s homepage open on your computer, head over to the vertical panel on the left side of the screen. Select the “templates” tab. At the top of the screen, users will find category options such as business, social media, education and so on. Select “social media.” The templates in this section are particularly useful for content creation. Advisors can choose from a variety of options specifically formatted for each platform (i.e., Instagram posts, Facebook stories, LinkedIn profile banners). For more detailed template options, users can type in various search terms at the top to help filter their results.

Another template category advisors may find useful is the “marketing” tab, located in the same spot as the social media templates. This section is more business-oriented, offering newsletters, flyers, business cards and more. Naturally, they’re all pleasing to the eye, and adding search terms to the top can help advisors locate more travel-specific templates.
Users who are feeling up to the challenge or who have experience with Canva may be interested in the “videos” template category. This is a great way to diversify the content on an advisor’s social media feed, and while it really doesn’t take that much more skill to edit, new users might prefer to stick to the basics of standard graphics first.
How To Make a Logo in Canva
An essential part of any business is having a distinguishable logo that helps you stand out, and Canva can assist with this too. Starting on the homepage, select the “templates” button located towards the top. Underneath in the search bar, type “business logos.” From here, if advisors are looking for general inspiration to get the creative juices flowing, these templates are a great place to start figuring out what elements you may or may not want. However, if advisors don’t feel that they’re the most creatively inclined or want options more closely aligned to the industry, typing in “business logos travel” will generate filtered results.
In a perfect world, users would find the template design that puts all others to shame, though that’s not likely to be the case. One way to bring your vision to life is by adding elements to a pre-existing design. To do this, navigate to the vertical panel on the left side of the screen and select “elements.” At the top search bar, type in some keywords of graphics you’re looking to add — “palm tree,” “airplane.” Find the one that fits your vibe and simply click it for it to appear on the template.

Alternatively, say a user likes two logo options and wants to combine elements of each into one design. To achieve this, open the template for one of the logo designs and select “add page” at the bottom. Then, navigate to the “design” tab at the top of the panel on the left and type in “business logo travel” to see the options. Select the second design you like, and it will format to the second page. Now that both logos are on the same document, users can copy and paste elements, fonts and images from one to the other. This trick of merging elements can be done when designing anything in Canva — flyers, newsletters, Instagram carousels and more.
Advisors should note that on Canva’s free version, when downloading the finished logo, it will save with a colored background, not a transparent one. Business pros who need the transparent version can save their Canva design to their computer, upload it to a free background remover website, and achieve the look that way.
How To Make a Business Card in Canva
Following a similar process as creating a logo, users can select “templates” at the top of the Canva homepage. In the search bar, type “business cards.” From here, advisors can filter their results even further by selecting the “category” button, which offers options in the traditional business card shape or rounded and vertical variations.
Additionally, users can generate results based on style, located next to the “category” button. This filters the templates by aesthetic, offering design options such as minimalist, professional or modern. Once advisors find a template that fits their fancy, click it and select the purple “customize this template” button.
Pro Tip: Want to add your logo that you worked hard to design? Select the “uploads” button located in the vertical panel on the left side of the screen. Find wherever you saved the new logo and click to upload it. It’ll appear in Canva’s library, and simply select it to add it to your design.

How To Create a QR Code in Canva
Creating a QR code is simple, and there are two ways users can do this. First, on the home screen, select the “apps” button on the left panel — it should be located towards the bottom. Next, type in “QR code generator” into the search bar and choose the option that reads “QR Code.” This specific app is the top option on the right side of the results. Advisors who only want to create the code should select “use in a new design” and open a blank document. Alternatively, if the user wants to add it to a pre-existing design, select that option instead when prompted. From here, the app will open and ask the user to paste in the appropriate URL. Select “add to design” and play around with the margin sizes or coloring. To save, click “download” in the upper right corner and choose the file type (likely PNG or JPEG).
The other option for extra pizzazz is to add your logo to the center of it! Following the same steps as above, get to the apps feature and type in “QR code generator.” This time, select the app labeled “QR Code with Logo” — it’s the fourth option down on the left side. Similarly, choose a new or pre-existing document, paste your link, upload your logo and voila! Now users have a personalized QR code, which can be saved the same way as the previous one.
How To Edit PDFs in Canva
Canva is great for many things, but this is arguably one of the greatest life hacks. Once Canva is open to its normal homepage, navigate to the “+ create” symbol in the upper left corner. A panel of design options will appear when selected, and from there, scroll down to the bottom of the list and hit “upload.” Next, insert your PDF file from wherever it’s saved, and Canva will automatically create an editable version of the document. While most elements like text, images and shapes can be easily manipulated, some pieces are limited in how they can be changed, which is something to keep in mind as advisors edit the file.
Once the travel pro is happy with their edits, to save the new version, click the white “share” button in the top right corner. Select “download” and which pages you want to save, then at the top under “file type,” change the format back to PDF.


comments